Macaron Shells
Macaron shells, fairly though, are infamous for being very hard to make. I understand this sentiment completely. It’s my job to make these treats a little more digestible and convenient to make. My recipe is adapted from Thomas Keller’s Bouchon Bakery “Vanilla Macarons” recipe. This recipe gives consistently great macarons. But I made it even easier by swapping an Italian meringue for a Swiss one (less cleaning and less multi-tasking required). Note also that this recipe will work for all flavors of macarons. That’s because the flavor of macarons is not in the shell (besides chocolate and vanilla); it’s actually just in the frosting. Thus, you can dye the shells whatever color your heart desires to give the illusion that they are actually flavored the same way as your filling.
Tips
I list all the ingredients in grams because that is the most accurate measurement for macarons. These cookies are so delicate and finicky that I cannot recommend making them without using a kitchen scale and using precise measurements.
I recommend making macarons several times. You will most likely fail on the first attempt (I did for sure), but you will improve with each batch. Watch this video for excellent tips on macaron making.
You can adjust the size of these macarons by using different-sized biscuit or cookie cutters. The baking time will remain the same, but use a different amount of frosting accordingly. Note that this recipe makes large macarons. They’re definitely American-sized. If you want cuter ones, pipe using a 1” diameter template.
If you’re having consistent issues with baking macarons, I highly suggest you use an oven thermometer to make sure your oven is running at the correct temperature. Also consider running your oven for around 1 hour before baking to ensure your oven has finished going through its heat cycles and won’t blast your macarons with excessive heat.
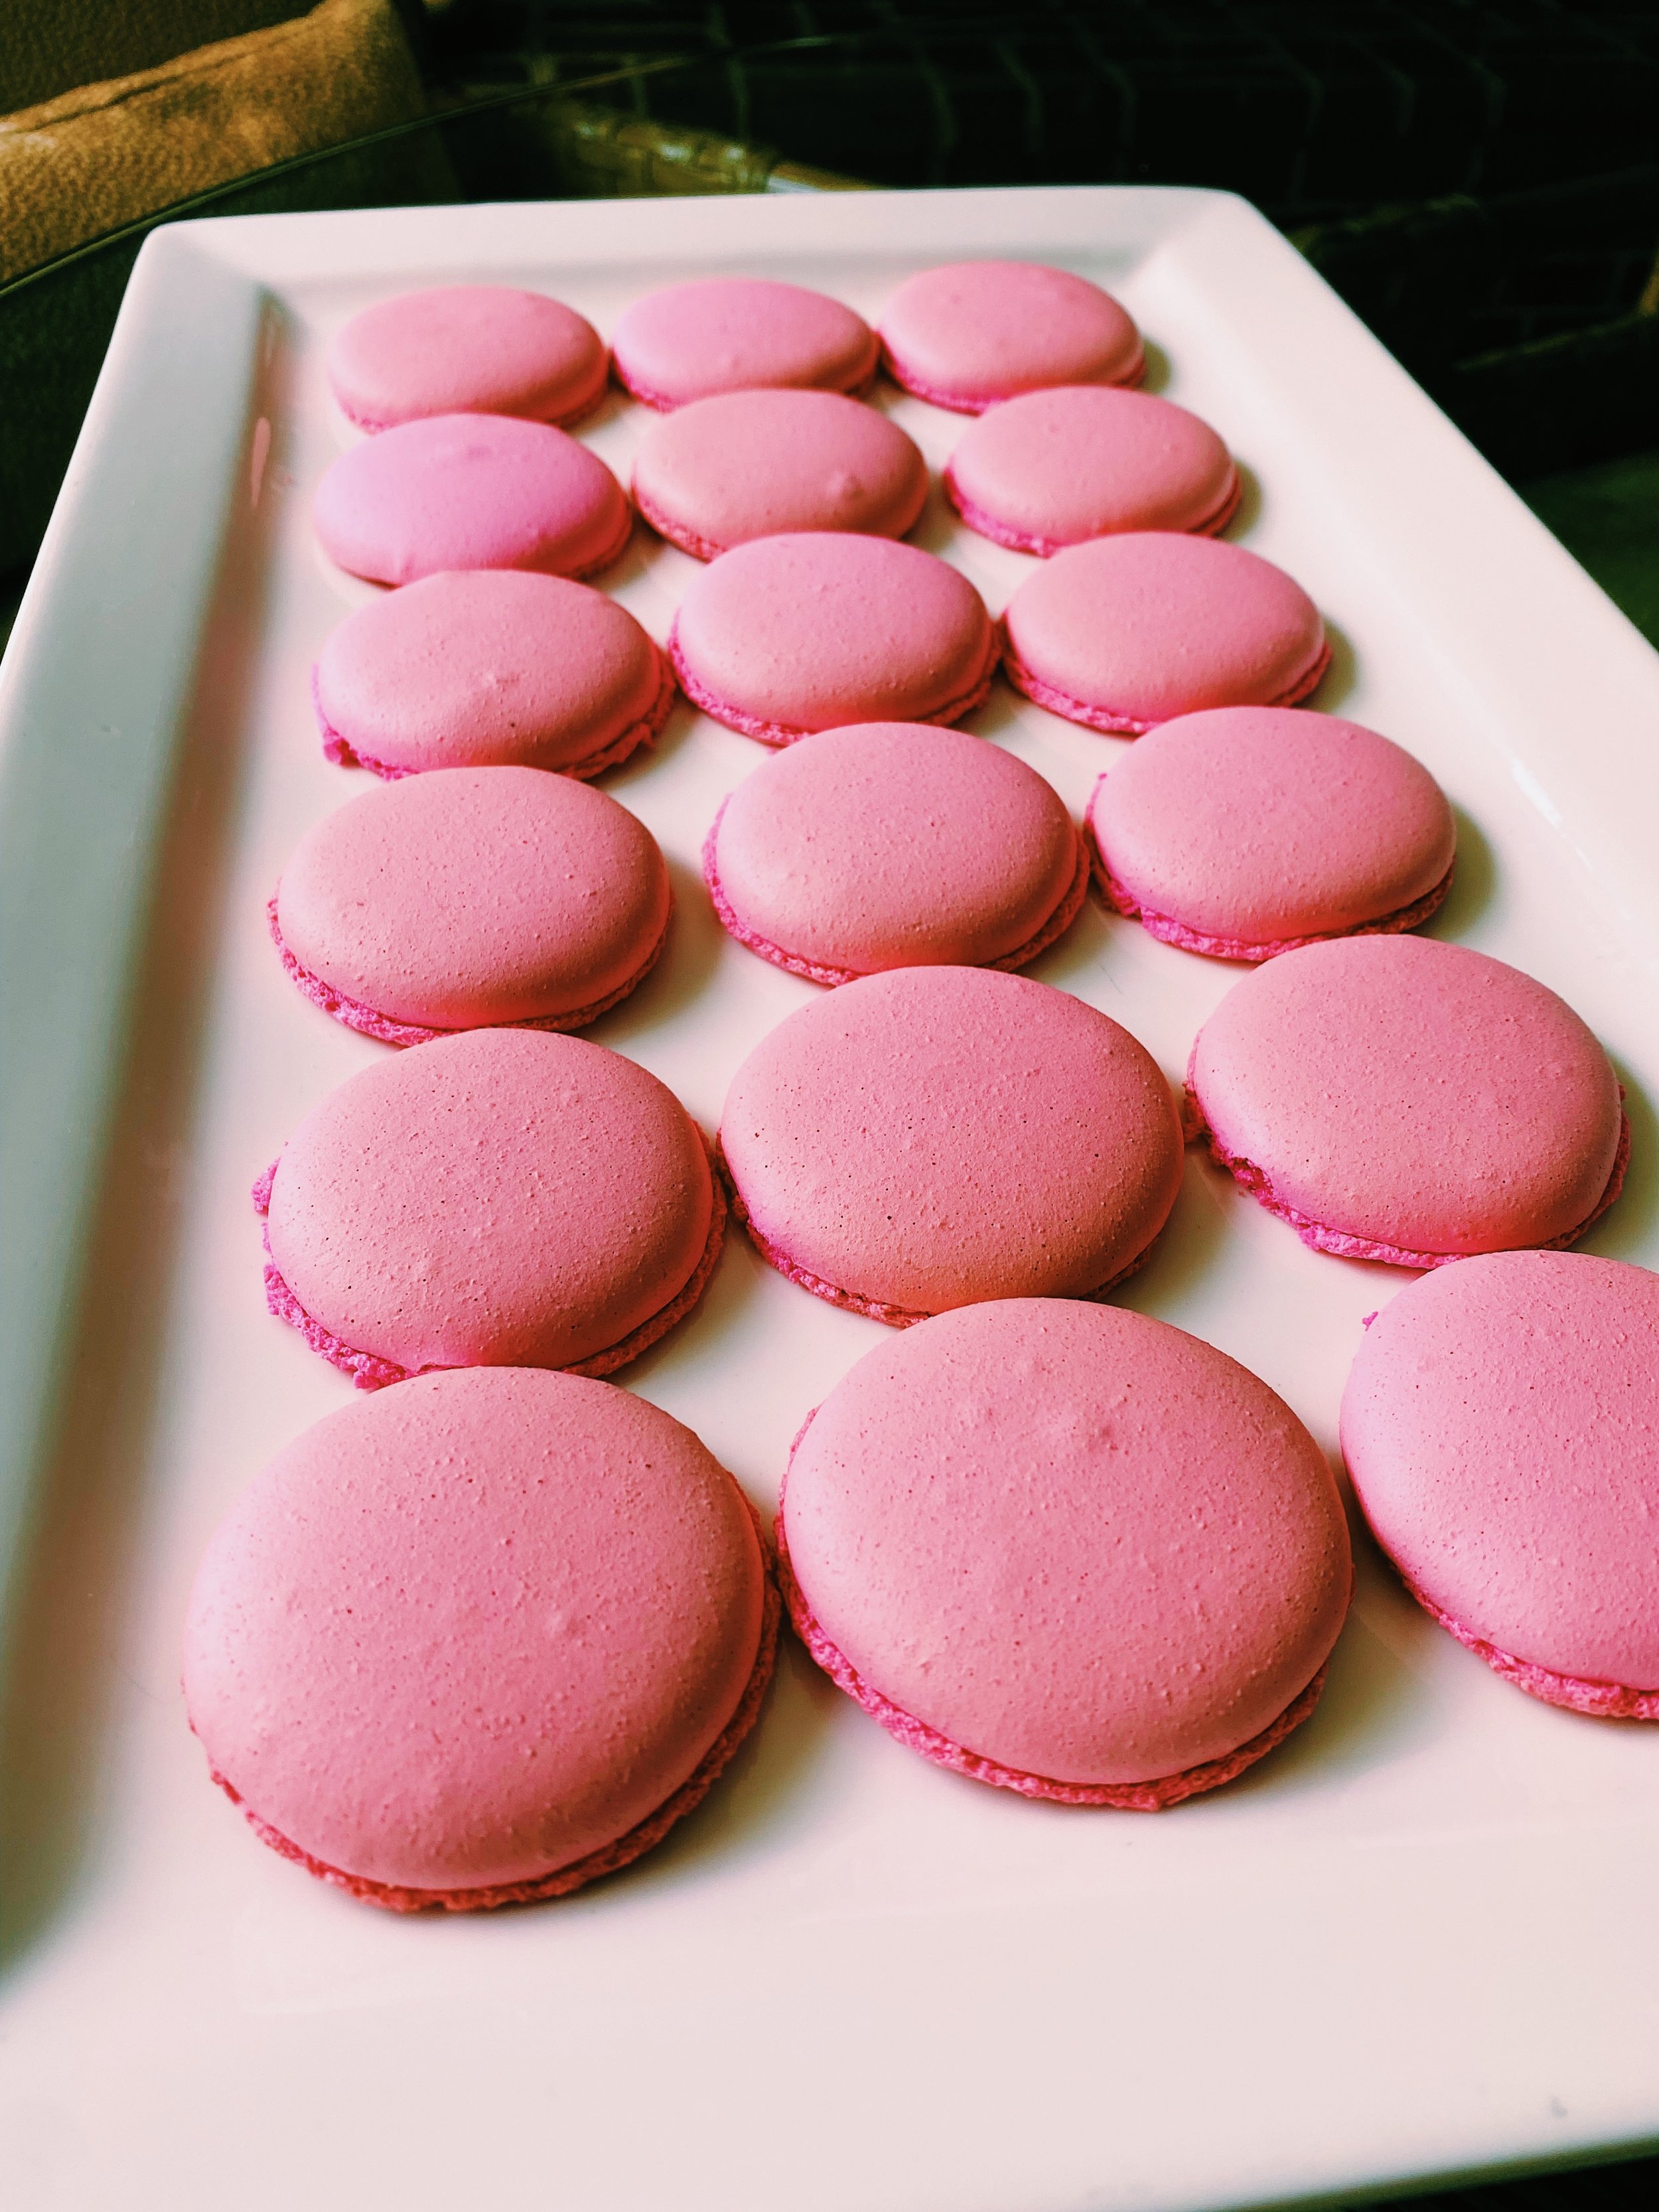
40-48 1.5” macaron shells
Ingredients
212g finely ground almond flour
212g confectioners sugar
For chocolate: 35g Dutch-processed cocoa powder
For vanilla: 1 tsp. vanilla bean paste
For any other flavor: 3-4 drops of food dye to match the flavor of the frosting
82g + 90g egg whites
238g granulated sugar
Special Equipment Needed
Stand mixer
Kitchen scale
Directions
Set a small saucepot with about 2 inches of water on the stove and bring to a light simmer. Line two standard half-sheet trays with parchment paper. Using a 1.5” biscuit or round cookie cutter and a sharpie, trace 5 circles spaced at least 1” apart along the top long edge of the sheet. Space 4 circles below the gaps in the first row, followed by another 5 circles, and then a final 4 for a total of 20 circles per paper. Spray some vegetable spray onto the baking sheets and place the parchment papers on top, sharpie side down, so they adhere completely flat. Alternatively, skip this arts and crafts step and just free-hand all the piping (which is what I do, actually).
Add the almond flour to a large bowl and whisk until all lumps are gone. Sift in the powdered sugar (and cocoa powder if making chocolate shells). Whisk the ingredients together. Add 82g of egg whites (along with the vanilla paste for vanilla shells or food dye for all other flavors) and stir with a spatula until the ingredients form a homogenous lump. Set aside.
Place the bowl of a stand mixer on the saucepot with simmering water (make sure the water is not touching the bottom of the bowl). Add 90g of egg whites and the granulated sugar to the bowl and whisk for about 2 minutes. Pinch the eggs and rub between your fingers to check to see if the sugar has completely dissolved and is hot (it should be, and if it isn’t, continue whisking).
Remove bowl from the double-boiler and attach to the stand mixer fitted with the whisk attachment. Turn mixer to high. Continue mixing until the meringue holds a medium peak, about 7 minutes.
Add about a third of the meringue to the almond flour lump you made in step 2. Mix it in until most incorporated. This will take a little elbow-grease. Add all the remaining meringue to the mixture and fold the meringue in until homogenous. Continue folding until you can draw a couple figure 8s with the batter without the stream breaking. This might not take very long to reach. If you’re unsure if you’ve reached the endpoint, always err on the side of under-mixing since over-mixing will lead to macaron puddles.
Transfer batter to a large pastry bag fitted with a ¼” round pastry tip. Pipe a round mound into each ring on the parchment paper, stopping just before the batter mound reaches the ring (I find it best to finish piping by quickly turning my wrist in a flicking motion to cut the flow of the batter). Continue piping mounds until you run out of batter. Give each tray several bangs on the countertop to pop any bubbles. Allow the trays to rest for about 20 minutes, or until the shells have dried out slightly.
Meanwhile, pre-heat oven to 350°F (convection) or 375°F (standard) with an oven rack in the middle position.
Bake each tray, one after the other, for 8-10 minutes on convection or 9-12 minutes on standard, until the macarons are shiny and firm to the touch (test a few). Allow to cool completely on wire racks.
Make the shells up to a day ahead of making the final macarons by storing in a covered container in the refrigerator. You can also freeze the shells for about two weeks. Make sure to thaw them in the refrigerator for a few hours before assembling.